The Preamble
I know this blog is typically dedicated to web development, web server administration, and programming so I promise to get around to relating this post to those topics but there are some other things to cover first. Bear with me and embrace the madness until we get to it. If it helps, think of it as an exercise in breaking the monotony. It’s good to break out of your comfort zone every now and again to try something new.
The Motivation
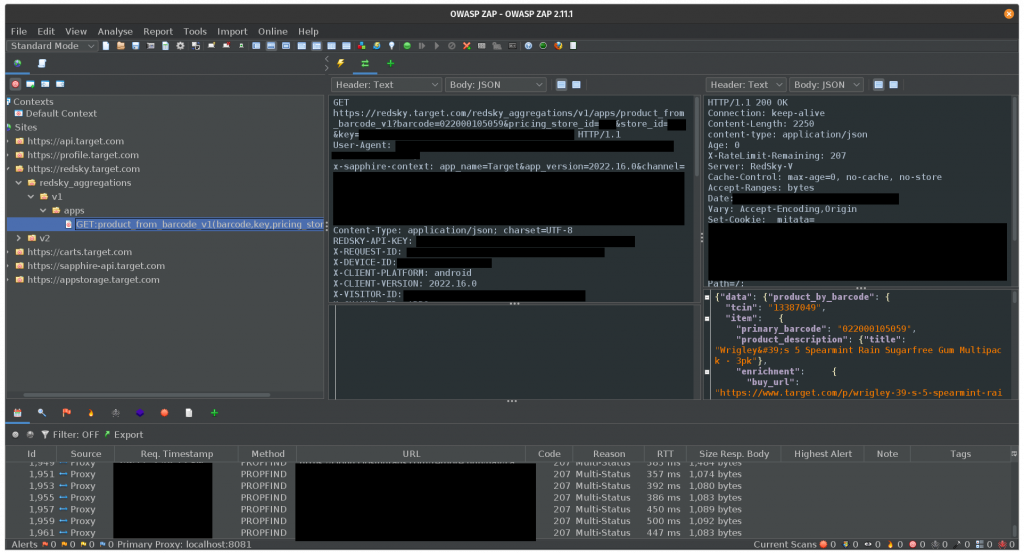
I recently found myself wanting to emulate the behavior I found in an Android app; specifically, the barcode scanner feature of the Target app. I’m working on a personal project that I hope to announce soon, but for now, all that you need to know is that I want to scan barcodes from food packaging. I tried finding this functionality on the Target website but came up empty handed. I knew the feature existed in the app because I had used it in the past. After installing the Target app, and confirming it did work there, I figured I could simply proxy all of the traffic from an Android device through OWASP ZAP and sniff the network traffic to discover the API endpoint. The benefit of finding the endpoint this way; as opposed to brute force scanning all of Target’s product lookup features found on the website, would be that I would know exactly how the HTTP request from the official Target app behaves, and could replay it for my own purposes by substituting my UPC barcode values.
Did you know barcodes come in a bazillion different formats? Ok, maybe not that many but the format used in everyday retail items is called UPC (Universal Product Codes). Each UPC code is a unique 12 digit number.
The Strategy
Typically, when you want to sniff the HTTP/HTTPS traffic of a web service, you would need to follow a few simple steps:
- Start the proxy tool. I’m using OWASP ZAP but Burp Suite, HTTP Toolkit, Postman, Telerik Fiddler, or others would also work just fine.
- Install the SSL certificate from the proxy tool on the target device. Usually this is a web browser on a computer but in this particular instance, it’s an Android device. With Android 11, this can be done by navigating to Settings > Security > Encryption & credentials > Install a certificate > CA certificate/Wi-Fi certificate.
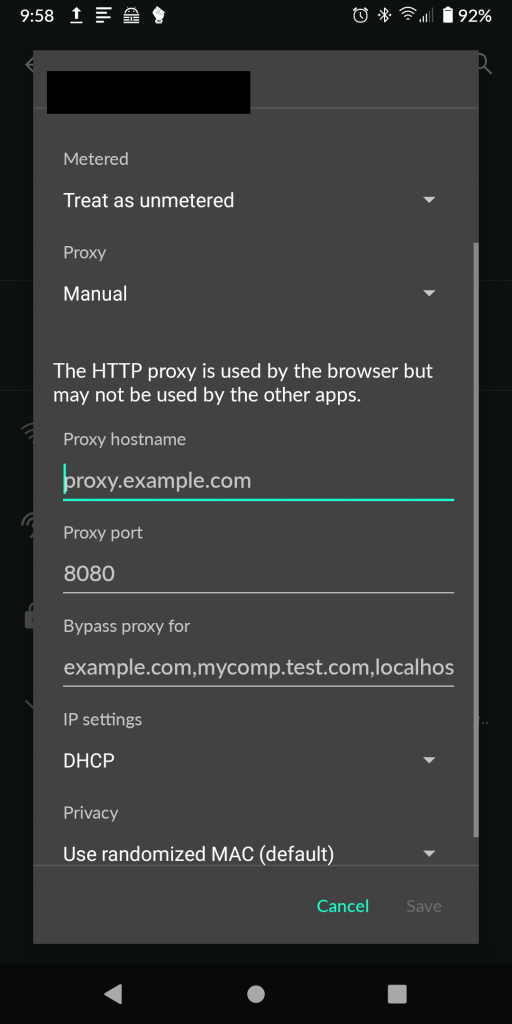
- Set the device to proxy traffic through the proxy tool. In Android 11, this is accomplished by opening your network connections, selecting your Wi-Fi network, editing the connection, and setting the proxy IP address and port number under “Advanced”.
- Use the application as you normally would with all traffic passed through your proxy tool.
Four simple steps, right? Wrong. So very wrong. After doing all of this, almost all apps on the device will give connection errors and behave as if they don’t have internet access. You see, this probably used to work with older versions of Android but as of Android 11, being able to add your own system certificate has been made significantly more difficult. I’m sure the Android developers have good reasons for doing this as it would make it more difficult for the baddies to be able to sniff the traffic of other apps on a compromised device. Which is technically what I’m trying to do but I’m not a baddie, right?

No, I’m definitely not a baddie. This is for research purposes.
The Dilemma
After installing ZAP’s certificate, Android 11 doesn’t respect my certificate across all apps and traffic on the system so I don’t see any traffic in my proxy tool aside from Firefox traffic. Interestingly, Firefox for Android does respect it and will proxy traffic albeit, very reluctantly since every HTTPS website gives an error about an trusting “untrusted certificate”. But wait, that means some HTTPS traffic is passing through the proxy, so what gives?
A little more research turns up a few possibilities. It turns out, Android app developers have a few methods of communicating from their app to the wider internet:
- Don’t use SSL/encryption at all. Most everything does these days, except for some games. 🤔
- Trust the user installed certificates, like Firefox seems to be doing.
- Use SSL Pinning, whatever that is.
- Roll an entirely independent credential store like the crazy bastards over at Facebook.
I doubt that the Target app development team went as hardcore as Facebook did when it came to securing their app so let’s dig into SSL Pinning by looking at the Android developer documentation:
Normally, an app trusts all pre-installed CAs. If any of these CAs were to issue a fraudulent certificate, the app would be at risk from a man-in-the-middle attack. Some apps choose to limit the set of certificates they accept by either limiting the set of CAs they trust or by certificate pinning.
https://developer.android.com/training/articles/security-config#CertificatePinning
Ah. 🤦
So now what? How am I to proceed from here? How do I tell the Target app to trust my certificates so I can view all of the traffic being sent from my device? The answer is simple: root.
The Workaround

If you’re unfamiliar with what “root” is, think of it as god-mode. It allows you to, install applications that aren’t available via official sources, hijack running processes on the device, and do whatever you want. It also typically voids any warranties because it will let you to break the device in more ways than you can imagine.
Explaining how to get root is outside the scope of this post but the gist of it is unlock the device’s bootloader (think of it as the BIOS), install a recovery tool, reboot into that recovery tool, and flash a binary that gives root access. Typically, users will also flash custom ROMs and various other binaries that allow for even more control at the same time.
I chose Magisk: The Magic Mask for Android for various reasons but mainly, for simplicity sake. Once I rebooted into recovery and flashed the tool, I could reboot my device normally and see the Magisk app available. From there, I could install the Magisk Module Manager app which would make the installation of third-party Magisk modules a breeze.
Upon searching the available repositories from the Magisk Module Manager app for terms like “SSL” or “certificate”, a few different options show up. I tried a few but settled on using Always Trust User Certificates. Once installed, it copies any user certificates to the system certificate store. This should get all traffic on the device to respect my certificate! Ah, but wait, the Target application only trusts certain certificates and mine isn’t one of them, so now what to do?
The Other Workaround
Since the app I’d like to view doesn’t trust my certificate, I’m going to make it. This is my device, and it will trust who I tell it to trust.
A long time ago, there was a popular mod tool called Xposed Framework and it came with lots of modules, including some that would allow users to bypass SSL pinning. If you’ve been clicking the links, you’ll notice the article about Xposed was from 2017 and referenced Android 7. Well, Xposed doesn’t work on Android 11 but there are spiritual successors to the project, specifically EdXposed. EdXposed can conveniently be installed as a Magisk module after installing yet another Magisk module called Riru.
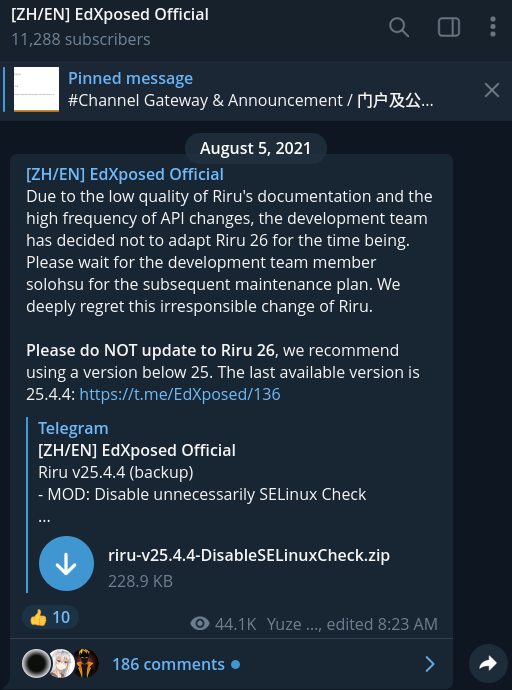
Riru is neat tool for injecting code into running processes. It’s also pain in the ass in that it’s no longer supported. It can be installed but after installing, EdXposed will crash during its installation claiming that Riru is not installed. What gives? It turns out, the Riru developers made some major changes in version 26 so if you’re trying to install EdXposed, you’ll need to be running an older version. The EdXposed developers recommend using 25.4.4.
I spent a significant portion of time troubleshooting and researching this issue alone, that I decided this entire post had to be made to prevent others from getting pulled into this time sink.
Great, so now that we’ve installed Magisk, the Magisk Module Manager app, Riru, and EdXposed, we’re ready to install an EdXposed module that will allow us to bypass SSL pinning 😩.
I first tried TrustMeAlready but it didn’t work. Ok, no problem; there are other Xposed modules to try. Like SSLUnpinning. Nope. There may be more but…
Spoiler alert: NONE OF THEM WORK.
That’s right. After all of this, you’ll be hard pressed to find an Xposed module that works with Android 11 and EdXposed. Why? I don’t know. I’m sure they worked at some point and it was probably really neat. But they don’t work now. I’m not an Android developer and I don’t follow the API changes close enough to say exactly what changed, but something did.
The Other Other Workaround
Are you getting sick of this yet? I sure felt ready to smash something and I needed someone else to suffer like I did, so thanks for suffering along. Now take that pain and anger; hold it close because there’s one more tool we can try.
Go ahead and uninstall anything you installed via EdXposed. You don’t need those modules anymore. Go ahead an uninstall EdXposed while you’re at it since we don’t need that anymore; we’ve got Frida.
If you’re familiar with reverse engineering or penetration testing at all, you’ve probably heard of Frida. I hadn’t so this was a learning experience for me. The way Frida works is by installing a client on your computer and then communicating with a Frida server on your target device; in this case, a rooted Android device. Once the Frida server is on the target device, it can be started and then connected to from your Frida client.
In my attempt to learn how to use Frida, I came across this guide that makes use of a couple other tools. I got sick of installing a half dozen other tools only to find that one of them doesn’t work for my use case so instead, I opted for this handy guide from the team behind HTTP Toolkit. The steps from which could be summarized as:
- Connect to the Android device via ADB.
- Copy the appropriate Frida binary to the device.
- Run the binary on the device.
- Download the SSL Unpinning Script.
- Point the Frida client to the app and run the script
Steps 1-3 look like this:
# Copy the server to the device
adb push ./frida-server-$version-android-$arch /data/local/tmp/frida-server
# Change this to match the name of the binary you just extracted

# Enable root access to the device
adb root

# Make the server binary executable
adb shell "chmod 755 /data/local/tmp/frida-server"

# Start the server on your device
adb shell "/data/local/tmp/frida-server &"
And step 5 looks like this:
frida --no-pause -U -l ./frida-script.js -f $TARGET_PACKAGE_NAMEYou can get the $TARGET_PACKAGE_NAME by using frida-ps -U or by grabbing the “id” query string parameter from the Google Play app link. For instance, https://play.google.com/store/apps/details?id=com.mytargetapplication.app
Seriously, go read the source material on the HTTP Toolkit blog. It’s great.
After installing the proxy’s certificate on the device, moving that certificate to the system certificates, telling the device to proxy traffic, and aiming Frida at the specified app, we should finally see some traffic come through.
The Finale
I promised I would relate this whole post back to web development so here it is: That barcode scan request? I can now replay it with whatever UPC barcode I would like and get a whole load of JSON back from Target’s undocumented RedSky API. And of course, bypassing SSL pinning doesn’t apply to this one singular app. We could now see all sorts of traffic from various apps like Snapchat, Uber, Twitch, and more. The potential for reverse engineering and penetration testing of these apps is limitless.
The Resources
This post wouldn’t have been possible without the heaps of various documentation posted by others. If this is something you’re attempting, and you’ve hit a wall, consider these resources: